
Text Inputs and External Modules
Add input fields for all text elements directly to your product page.
In Shopify, the new Theme 2.0 system allows easy and deep integration of the Fancy Product Designer into the Product Page. This article will show how to set up the text layer panel like this:
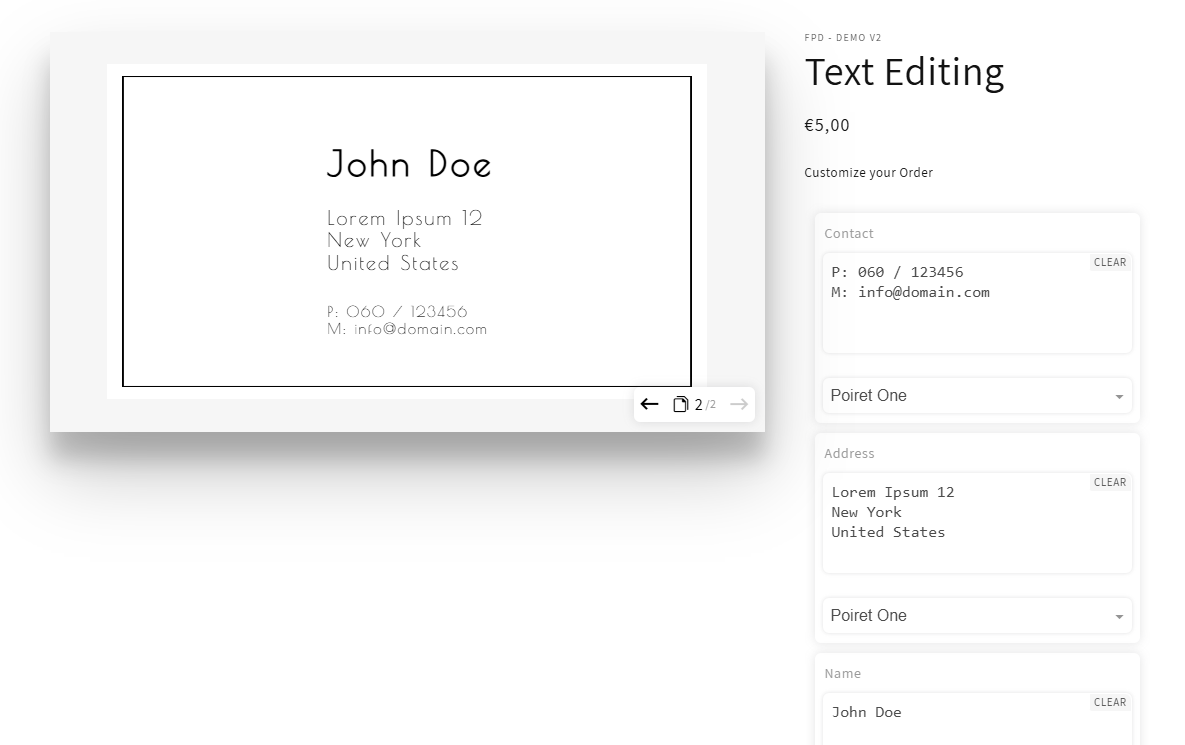
You can find a live example of this product in our demo store.
Adding external modules to the detail section of your product is great for simplifying the interaction with the product designer. It works especially great for designs and images but also for the text layers modules, which allow the user to edit every text element directly on the product page.
To set this up, open the "Customize" view of your theme in Shopify and create a new Product Template. You can find more information here if you are unfamiliar with the Shopify Theme customization.
But always feel free to contact us for help.
In the new Product Template, you can add a Fancy App Block called "Fancy External Module."
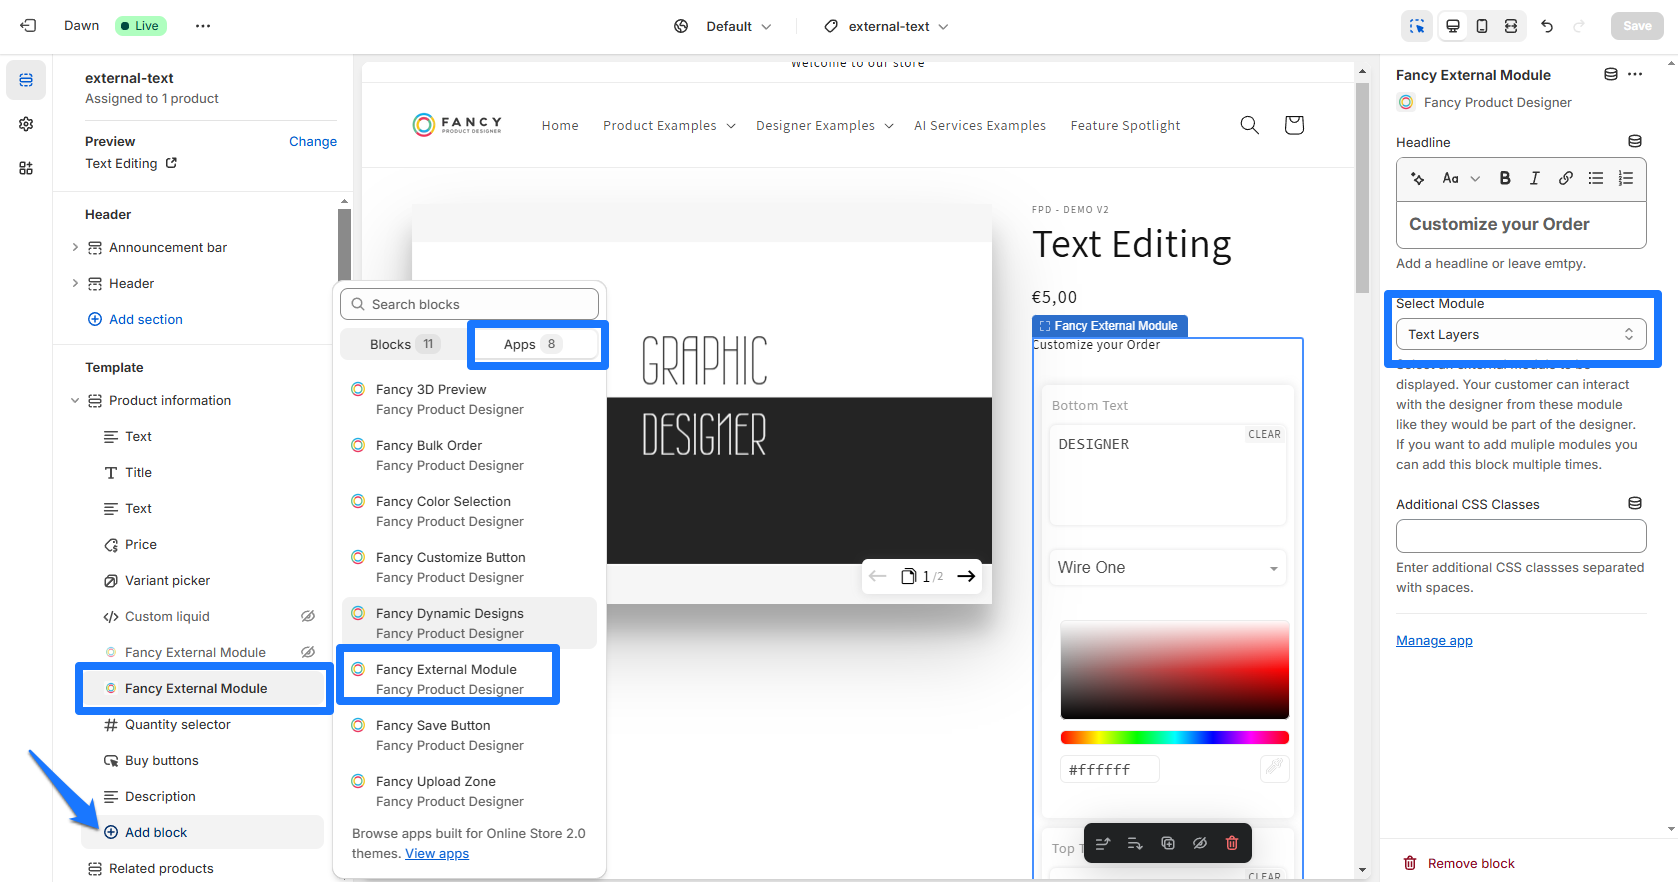
Select the "Fancy External Module" block from the app block menu. This allows you to add different modules. These are typical Fancy Product Designer functions to the product details section, like adding an image.
In the drop-down menu, select Text Layers. This module shows all text elements of the product (that the customer can edit). Changing the font family or color is also possible.
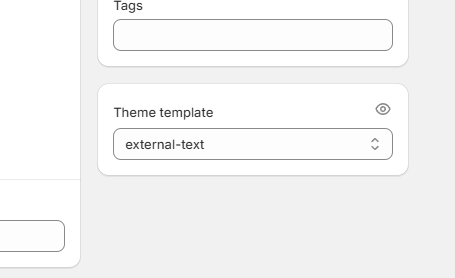
You need to assign the new product template to the products you want to use it with. You can edit a Product in Shopify and change the product template in the bottom right corner.
Now you should see all the text elements in the product on the page and have input fields for them. No worries if you feel the style doesn't perfectly match your theme. This is just HTML and CSS. You can ask your web designer to adjust it.
Keep text inputs when the customer switches products
If your customers move between customizable products, you can keep the text they have already entered. In the Fancy Product Designer app admin, go to Settings > Advanced and enable "Keep text inputs through product switches". When a product is switched, the text of fields with the same name will be kept.
The setting "Keep text inputs - matching mode" controls how the kept text is matched to the fields of the new product:
- Title (default): Fields are matched by their field name, falling back to the text link group.
- Link group only: Fields are matched strictly by their text link group; fields without a link group are ignored.
Choose "Link group only" if you rename fields between products but link them with the same text link group.
If you have trouble setting up the text layer module, please don't hesitate to contact our support.
Updated on: 22/07/2026
Thank you!